Thursday, March 21, 2013

East Van Doc Toppers


I have another new FREE pattern to release! My East Van Doc Toppers - they look like a full pair of socks, but they aren't! These thin little leg-warmers are a great way to tackle some of those single skeins of sock yarn you have in your stash... 


From the pattern notes:

"I created these leg-warmers as an easy way to add a splash of colour to my wardrobe; I had three-quarters of a skein left over from a sweater project, and I wanted to make some easy, feminine matching leg-warmers. Don’t even have THAT much yarn? Just make them shorter! After all, they are just supposed to poke out the top of your boots! They will look like nice long socks, but with a fraction of the knitting time!"


You can download the pattern here!

Or nab it in my Raverly Store.

I hope you enjoy!


Cheers!
-Grace     

Thursday, March 7, 2013

Now On Twitter!

Want another way to follow me on the internet!? Add on me on Twitter!

@ThinkSweetGrace

...or "Like" my page on Facebook to be updated on all the latest news!

Cheers!
-Grace

Wednesday, March 6, 2013

Terminal And Main - Cowl and Hat Pattern


Today I have released my first paid pattern: Terminal and Main, a pattern for a slouchy hat or cowl.

From the pattern notes:

"This pattern is designed to finesse our intermediate knitting skills while creating a fun and funky cowl or hat. By the time this project is completed, the knitter will be well-practised in multiple varieties of increases and decreases, working in the round, and creating textured patterns involving simple lace and seed stitch. This pattern can be easily adjusted as well; with a little math, it can be made larger or smaller, or completed with a different weight of yarn."

This pattern can be made larger or smaller by adjusting the amount of stitches cast on in multiples of 4 or knit in a different weight of yarn.


This is the pattern I teach how to complete in my Knitting 202: Beyond the Scarf class at Bird On A Wire! Want to learn in person? Check out more info on here.

This pattern can be purchased here for a special introductory price of $2.99 (Canadian) until March 31st 2013. As of April 1st, it will be available for $4.99, so scoop up your copy soon!

And please check out my other patterns in my Ravelry Pattern Store.


Hope you enjoy!

Cheers!
-Grace

Tuesday, March 5, 2013

Happier Than A Pig In... Pink!

This weekend I tried dyeing some yarn! I have had a little experience with acid dyes under the instruction of my good friend Jo Anne, and I have been craving to give it another go for a while now. So last week, I bought some acid dyes from Maiwa on Granville Island and started to play with some different hand-painting techniques. I have only cracked open one colour so far - but even playing with different dilutions of a single shade has provided me with lots of inspiration and experimentation!

I tested out a few different strengths of one shade of fuchsia - just by adding more water, I got paler shades of pink.


Than I hand-painted two skeins to try to achieve a "tonal" look. The first skein is purposely lighter than the other.


I was fairly happy with the lighter skein, but I thought the colours in the darker skein were too broken up. So the next day, I decided to try to over-dye both skeins in a diluted shade of fuchsia to see if I could even out the colours a little.


The bottom skein in the above photo is my first/lighter skein and top skein is my second/darker skein.  I was VERY happy with how the first skein turned out. I think the second skein is now a little too dark overall and is still has too much contrast between shades.

So just for kicks, I dyed a third skein, with a different technique to try to get the subtle colour shifts I was looking for. I wanted just a little bit of variation, so the yarn would look like a solid colour from a distance but still have a little bit of contrast to add some interest.  I believe I had success with this third skein! (Featured on the bottom of the photo below.)


I knitted up a little bit of each skein to see what the swatches would look like! In conclusion, I was equally happy with the results from skeins 1 and 3, but the third skein required less steps and gave me a more consistent look overall. If I was going to recreate a slightly-tonal yarn again, I would use the same procedure I tried on the third skein. I took photos of the swatches, but the photo for my second skein turned out HORRIBLE, and I frogged it before I checked it properly on the computer - my bad! So I apologize for the crappy comparison photos below! In order, they feature skeins 1, 2 and 3:


I can't wait to try out some more dying! Next, I want to create a lighter tonal pink yarn, then start to play with some purple.. I'm going to work my way around that colour wheel :D

Cheers!
-Grace

Friday, March 1, 2013

March/April Skill Stretch: Spinning The Goat


This skill is going to take a lonnnng time to stretch.

This goal actually combines a few different skills; conquering a new drafting method, spinning a new type of fibre, and spinning enough for a SWEATER, which I have never done before.

Last month, I started preparing fibre from a mountain goat hide to spin. If you missed that post, you can check it out here.


This month, I am going to start spinning the resulting fibre. Slowllllllly over the last few weeks I picked out all the guards hairs from my collected fibre.  It was an intense project. I set up a nice station in my living room, watched the second season of House, and ended up with 46.4 delicious ounces of baby-fine goat hair. Now, does this count as cashmere?!


I practised spinning some cotton to 'warm up" for the project. The cotton had a very short staple length, so it was tough to get used to! Below is a photo of the cotton (with a pencil for scale):


Then I moved on to a small sample of mountain goat hair. I found that using a short forward draw felt like the most comfortable drafting method for me (I let the twist enter the web between my drafting and supply hands, but I did not move my supply hand backwards. I fed the twisted fibre into my wheel once I had allowed enough twist into the space between my hands). One day I will learn a proper long draw, but the fibre feels "right" when I draft it this way, and I am able to get the control and diameter I want. If I am going to spinning 40-odd ounces of this stuff, I might as well do it the way I feel the most comfortable, right!??!

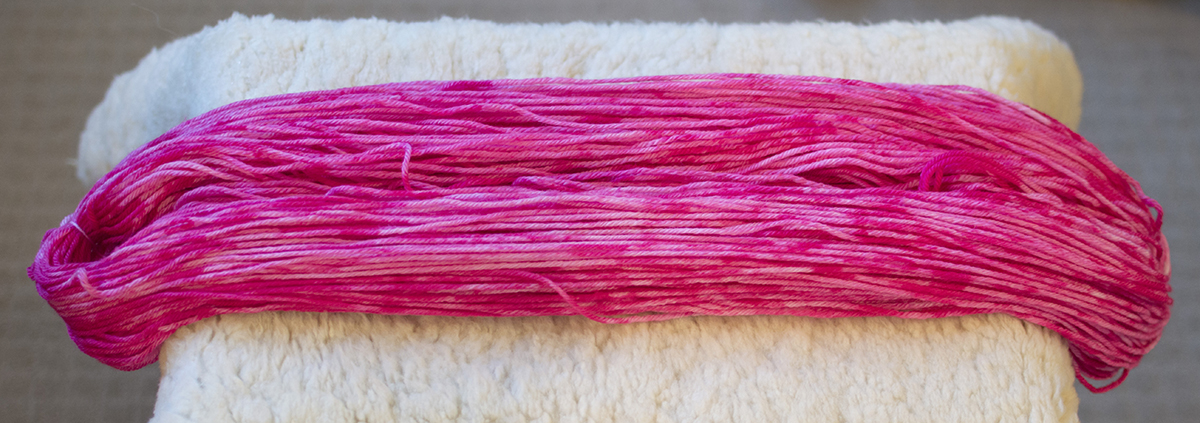
I chain-plied my resulting test, and this is what my final yarn looked like:


This three ply sample is a wee bit thinner than sock yarn, but very fluffy. I was worried it might be too thin to knit a sweater from without going crazy, but when I compared it to the merino-silk yarn I used for this sweater, I found the diameter of the yarn was roughly the same. And that's one of my favourite sweaters to wear.

In conclusion - I am sure it's going to take me longer than a month to spin all that fibre. But that's ok - I think I am covering at least 3 skills with this goal, so if it takes some extra time, I am still stretching myself!

I will update as I go... there is now a list on the right side of my blog that is going to "count down" the amount of ounces of fibre I have left to spin! And I will post photos when I have them too.

Cheers!
-Grace